zenoven:新手JAVA路(3) HelloWorld
上一节我们讲了Eclipse的基本安装,但是没有具体说明怎么用Eclipse编写程序,这一节我们就来用Eclipse编写最基础的HelloWorld程序。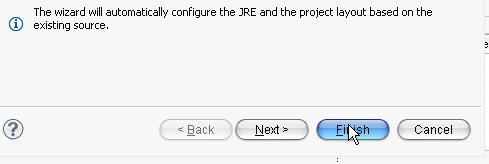
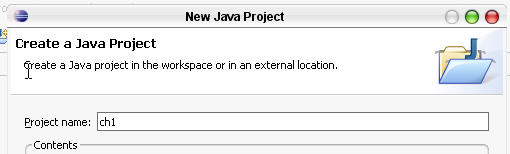
首先启动Eclipse,依次点击File>New>Java Project ,然后在project name 上面输入工程的名字,这里我们输入ch1
<img class="alignnone size-full wp-image-137" title="eclipse5" src="http://www.zenoven.com/wp-content/2009/08/eclipse5.jpg" alt="eclipse5" width="510" height="154" />
然后点击finish
<img title="eclipse6" src="http://www.zenoven.com/wp-content/2009/08/eclipse6.jpg" alt="eclipse6" width="489" height="164" />
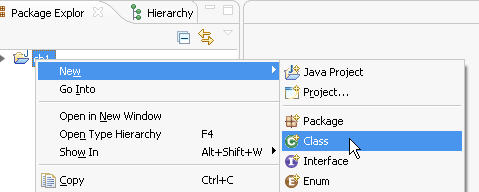
然后在ch1上面点击右键,依次选择new> class<img class="alignnone size-full wp-image-140" title="eclipse7" src="http://www.zenoven.com/wp-content/2009/08/eclipse7.jpg" alt="eclipse7" width="479" height="192" />
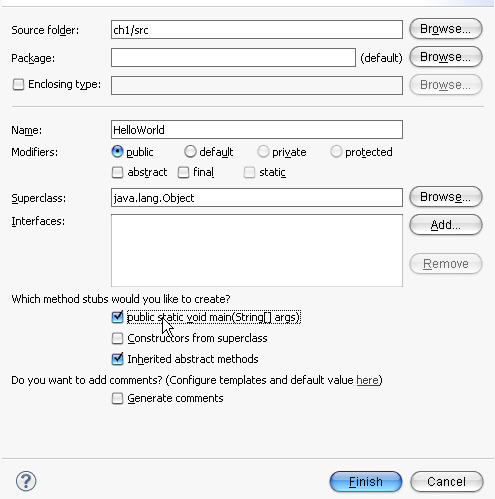
然后在Name上面填写HelloWorld(注意大小写,JAVA严格区分大小写,另外Java的class(类)的名字的命名规范是每个单词的首字母大写,其他字母小写),然后选中public static void main(String[] args)
<img title="eclipse8" src="http://www.zenoven.com/wp-content/2009/08/eclipse8.jpg" alt="eclipse8" width="495" height="499" />
点击finish。
其实到现在才进入真正的JAVA编写阶段。
在中间的代码窗口中加入这样一行语句
System.out.println("你好,这是我的第一个JAVA程序!");
下面是全部代码
<img class="alignnone size-full wp-image-142" title="eclipse9" src="http://www.zenoven.com/wp-content/2009/08/eclipse9.jpg" alt="eclipse9" width="528" height="184" />
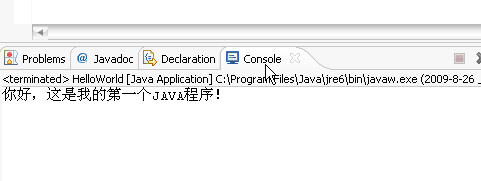
然后按Ctrl+S保存,点击菜单栏的Run>Run,这样在屏幕的最下方就会输出一行文字
<img class="alignnone size-full wp-image-143" title="eclipse10" src="http://www.zenoven.com/wp-content/2009/08/eclipse10.jpg" alt="eclipse10" width="423" height="82" />
<img class="alignnone size-full wp-image-144" title="eclipse11" src="http://www.zenoven.com/wp-content/2009/08/eclipse11.jpg" alt="eclipse11" width="481" height="181" />
这样我们的HelloWorld 程序就真正的显示出来啦~~